A perfect sourdough bread recipe requires just four basic ingredients. Water, flour, salt, and an active sourdough starter combine to create those beautiful, crusty loaves found in artisan bakeries.
The magic happens when you skip commercial yeast used in supermarket bread. Sourdough bread uses a live fermented culture that enhances nutrition and digestibility. The dough preparation takes only 10 minutes to mix, which makes it ideal for busy bakers.
Beginners and experienced bakers alike can follow this process to create delicious bread. You’ll learn to make your own sourdough starter over 7-14 days and master the technique to bake bread with that signature tangy flavor. The result will be a chewy texture inside and crispy, crackly crust outside. Time to create your perfect loaf!
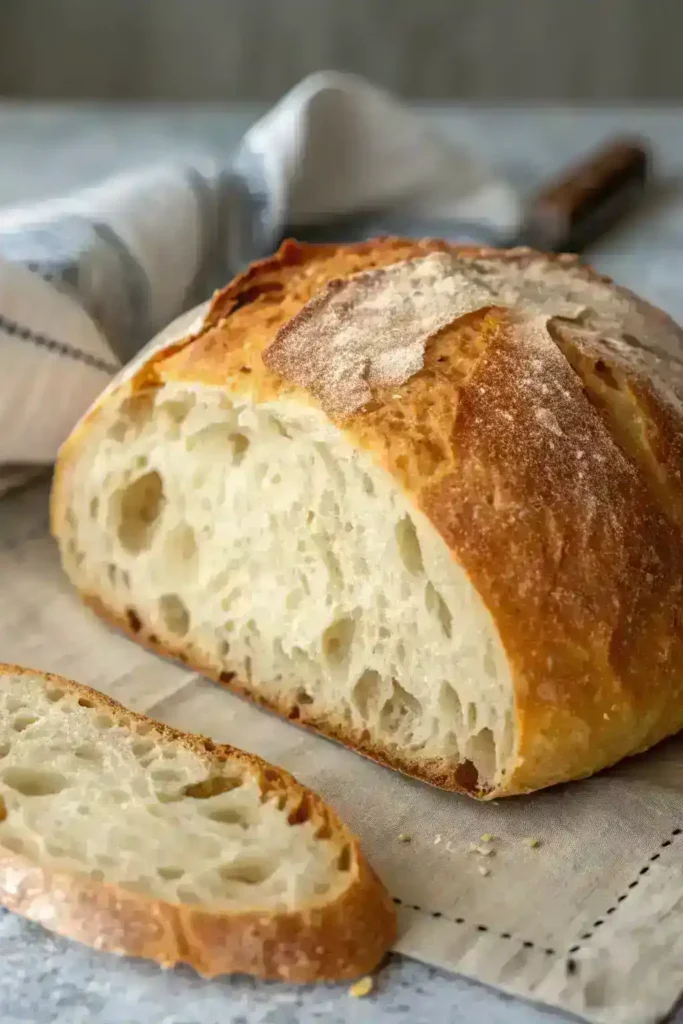
Table of Contents
What Makes Sourdough Bread Different
Sourdough bread is different from regular bread because of its special fermentation process, tangy flavor, and health benefits. Learning what makes this age-old bread-making technique special will help you create the best simple sourdough bread recipe with starter at home.
The Science Behind Wild Yeast Fermentation
Regular bread uses commercial baker’s yeast, but sourdough controls wild yeast that lives naturally in flour and your environment. Wild yeast (primarily Candida milleri) works together with lactic acid bacteria (Lactobacillus) to create something exceptional. These microorganisms live in perfect balance—about 100 bacteria cells for every single yeast cell.
Wild yeast eats the carbohydrates in flour and produces carbon dioxide that makes your bread rise. The beneficial bacteria turn sugars into lactic and acetic acids, which give sourdough its signature sour taste. This partnership between microbes creates flavors that are nowhere near what commercial yeast can achieve.
These acids do something else too: they create conditions where harmful microbes can’t grow, which preserves your bread naturally without additives. On top of that, the fermentation breaks down sugars and starches in the flour as yeasts consume them, so you end up with less sugar in your finished bread.
This science explains why patience matters so much when you make your first simple sourdough bread recipe with starter—wild fermentation takes longer than commercial yeast but gives you better results.
Health Benefits of Naturally Leavened Bread
The slow fermentation process that creates delicious simple sourdough bread offers remarkable health benefits. Sourdough bread affects blood sugar levels by a lot less than regular bread. The organic acids slow down how quickly your body digests starch.
Your body digests sourdough more easily. The acids and enzymes break down proteins, including gluten, which makes the bread easier on your digestive system. Note that if you have sensitivity to regular bread, sourdough might work better—but it’s not gluten-free.
Sourdough also helps your body absorb more minerals. The fermentation breaks down phytates (substances that block mineral absorption), so you get more calcium, magnesium, iron, and zinc from the bread.
The fermentation creates prebiotic and probiotic-like properties that boost gut health. Sourdough has lower levels of FODMAPs (fermentable carbohydrates that can upset some people’s digestion), which might make it suitable if you have certain digestive issues.
Why Homemade Beats Store-Bought Every Time
Most commercial “sourdough” breads don’t meet authentic standards. Store versions usually contain added commercial yeast to speed up production, which sacrifices flavor and health benefits. Without rules about what makes bread “sourdough,” manufacturers take shortcuts that compromise traditional qualities.
Real sourdough needs just three ingredients: flour, water, and salt. Store-bought versions add preservatives, oils, sweeteners, and dough conditioners. These extra ingredients take away from both taste and nutrition.
Making your own simple sourdough bread recipe with starter lets you control ingredients and fermentation time completely. You can develop the exact flavor you want—from mild to distinctly sour. You also get to pick better flours, including organic and whole grain options.
The money savings are big too. You can save about 75% compared to buying artisanal loaves. Baking one loaf weekly saves up to $260 each year.
Beyond saving money, becoming skilled at this ancient craft brings its own satisfaction. Starting your own sourdough culture and watching it turn simple ingredients into a beautiful, crusty loaf connects you to thousands of years of baking history. Your homemade sourdough lets you adjust water content, try different flours, and customize bread that fits your dietary priorities or taste preferences.
Creating Your First Sourdough Starter
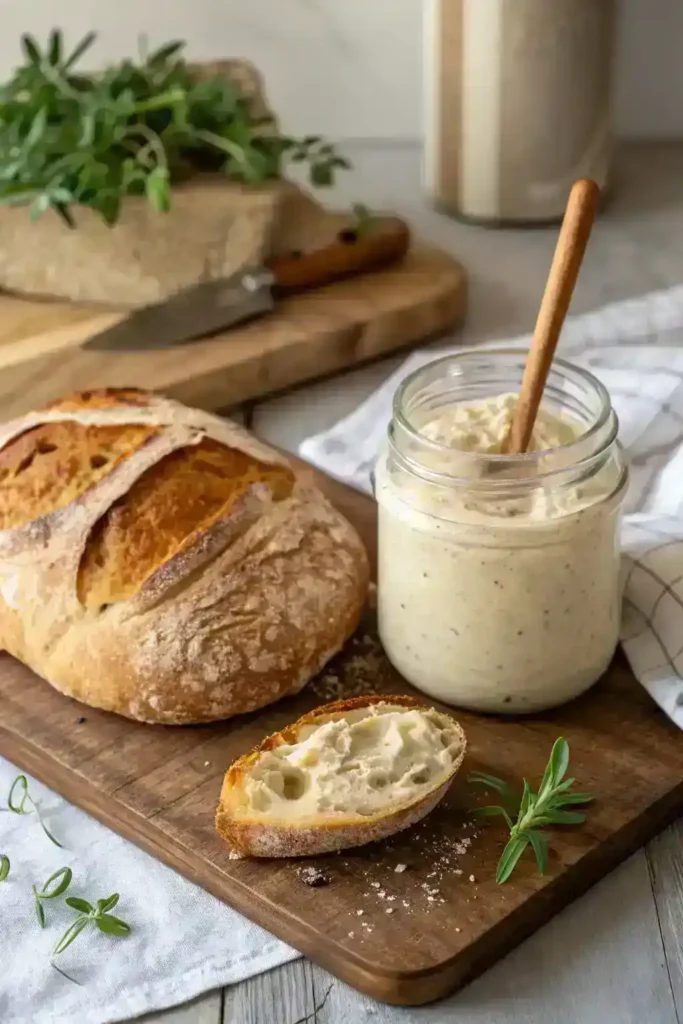
Creating a sourdough starter from scratch resembles starting a relationship with a living organism that will become the life-blood of your sourdough bread recipe. A sourdough starter is just a mixture of flour and water that captures wild yeasts and beneficial bacteria from your environment.
Simple 7-Day Starter Recipe
Your sourdough trip needs patience and consistency. This straightforward process will give you an active starter in about a week:
Day 1: Combine 60g of whole wheat or rye flour with 60g of filtered water in a glass jar. Stir until no dry flour remains, then loosely cover to allow airflow. Keep in a warm spot (around 75-85°F) for 24 hours.
Day 2: Small bubbles might start forming—this shows the first sign of fermentation! Add 60g of flour and 60g of water to your existing mixture, stir well, and leave for another 24 hours.
Day 3: The activity should increase now and you might smell something slightly sour. Keep 20g of your starter and discard the rest, then feed with 20g water and 20g flour. Whole grain flours work best to establish fermentation early on.
Days 4-5: Keep up with the daily discard and feeding process. The smell changes from possibly unpleasant to something more pleasant and yeasty. Start feeding twice daily on day 5 (morning and evening) using the same ratio.
Days 6-7: Keep feeding twice daily. Your starter should show reliable activity after each feeding. You can switch to all-purpose or bread flour gradually if you want.
Note that discarding seems wasteful but remains essential. Your starter would grow too large and need too much flour without this step.
Signs Your Starter is Ready to Use
Your success in baking depends on knowing if your starter is mature enough. These indicators will help:
A healthy starter doubles or triples in volume within 4-8 hours after feeding, showing consistent rising and falling patterns.
Bubbles throughout the culture and on the surface show active fermentation. The texture becomes light and airy—almost spongy or fluffy like roasted marshmallows.
The smell should be pleasantly sour and yeasty—as with yogurt. A starter that smells like nail polish remover or acetone just needs feeding.
Many bakers do the “float test”: a small spoonful of starter dropped in water should float, indicating readiness. This test isn’t perfect though, especially with whole grain flour starters that might not float even when active.
Your starter needs about 14 days to fully mature, even if it shows activity earlier. Better bread comes to those who wait during this development phase.
Troubleshooting Common Starter Issues
No bubbles in sight? Check your temperature—starters thrive in warmth (75-85°F). Cold environments slow fermentation substantially. Using warm water for feedings can boost activity.
Dark liquid on top (called “hooch”) isn’t a problem! This alcohol just means your starter needs food. Pour it off or stir it back in before feeding.
More frequent feedings help starters that smell strongly of vinegar, acetone, or gym socks. These odors mean your starter is hungry or too acidic.
Pink, orange, or fuzzy mold means you need to start over completely. In stark comparison to this, a white film that isn’t fuzzy is usually harmless Kahm yeast—just scrape it off.
Missing a feeding won’t ruin everything—starters are tough. Just pick up your regular schedule again. Missing several feedings in a row can hurt performance as acid builds up.
Metal utensils won’t harm your starter (unless they’re reactive metals like copper), and missing the exact 12-hour feeding window won’t kill it. These hardy creatures have survived thousands of years—they’ll survive small mistakes in care.
Essential Equipment for Beginner Bakers
Starting a trip to make bakery-quality sourdough bread starts with the right tools. You don’t need to spend thousands on professional equipment to make fantastic sourdough bread with starter. Here’s a guide to what you really need versus what’s nice to have, plus some budget-friendly options that work just as well.
Must-Have Tools vs. Nice-to-Have
These simple tools are non-negotiable to start your sourdough adventure:
Kitchen Scale – A digital kitchen scale that measures in 1-gram increments tops my list of essential tools. Accurate measurements are crucial to get consistent results in any sourdough bread recipe with starter. Reliable scales cost as little as $10, which makes them a smart buy. One expert puts it clearly: “Do not attempt making sourdough bread without a digital scale on hand”.
Mixing Bowl – You’ll need a large glass, ceramic, or stainless steel bowl to mix your dough. Plastic works too but can develop scratches where bacteria might grow. Clear bowls let you see how your dough progresses.
Dough Scraper – This versatile tool helps you mix, shape, and clean surfaces. Both rigid bench scrapers (metal or plastic) and flexible bowl scrapers are a great way to get better at handling wet dough without creating a mess.
Proofing Container – Your shaped dough needs a home for its final rise. Professional bakers use bannetons (proofing baskets), but a medium-sized bowl lined with a cotton kitchen towel works great for beginners.
Baking Vessel – A crispy crust in sourdough bread needs trapped steam during baking. A Dutch oven or cast iron pot with a lid (at least 4-quart capacity) does the job perfectly. Your cooking Dutch oven works great for bread too.
Parchment Paper – This helps you move your dough to a hot baking vessel and prevents sticking. Reusable parchment reduces waste and works well.
Scoring Tool – Your dough needs slashing before baking. Professional bakers use a lame (specialized razor blade holder), but a sharp knife or regular razors from the hardware store work well for beginners.
These additional tools improve consistency if you want to invest more:
Temperature Control – A digital thermometer helps you track dough temperature. Starters work best between 75-85°F (24-28°C).
Dough Containers – Clear containers with measurement markings show how your fermentation progresses.
Bread Knife – A quality serrated knife cuts clean slices through crusty bread without squishing it.
Budget-Friendly Alternatives to Specialty Equipment
The sort of thing I love about sourdough baking is how you can start with what you already own. Common household items make great substitutes for fancy equipment:
For Bannetons: A well-floured cotton kitchen towel in any bowl does the job. Some bakers use colanders or ricotta baskets creatively.
For Dutch Ovens: Any oven-safe pot with a lid can work. Thrift stores often have amazing Dutch ovens and clay bakers at bargain prices.
For Dough Storage: Food-safe plastic containers from your kitchen work just as well as specialty ones.
For Banneton Covers: Plastic bags from grocery store produce like apples or oranges make perfect covers.
For Lame: A sharp kitchen knife or single-edge razor blade scores dough effectively.
Note that bakers made wonderful bread long before specialty equipment existed. Good tools make the process easier, but don’t let basic equipment stop you from trying sourdough bread with starter. Start with the essentials—a scale, bowl, scraper, and baking vessel. You can build your toolkit as your skills and confidence grow.
Basic Sourdough Bread Recipe for Beginners
You’ve got your active starter and tools ready, so let’s take a closer look at the bread-making process. Learning a simple sourdough bread recipe means understanding a few key techniques that will help you succeed.
Ingredients and Measurements
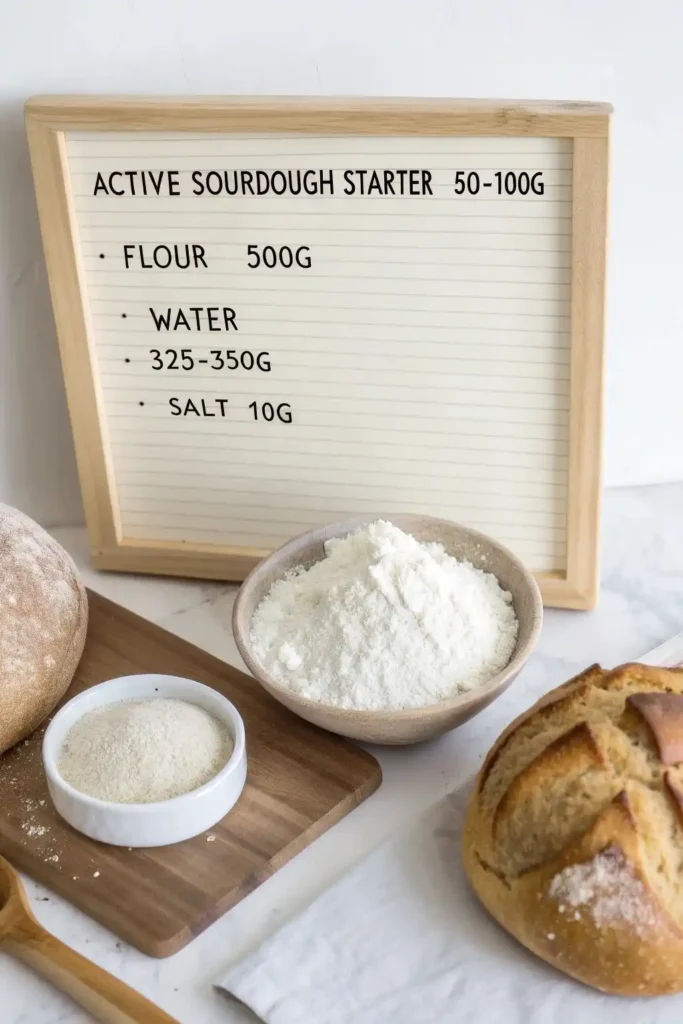
A genuine sourdough bread needs just a handful of ingredients:
- Active sourdough starter: 50-100g (approximately 1/2 cup) of bubbly, active starter that passes the float test
- Flour: 500g (about 3 1/2 cups) bread flour or all-purpose flour
- Water: 325-350g (about 1 1/3 cups) filtered water, preferably warm
- Salt: 10g (about 2 teaspoons) fine sea salt
Accurate measurements will give a consistent result every time. Professional bakers use a digital scale rather than measuring cups. This precision helps you nail the right flour-to-water ratio.
Quality ingredients make a big difference. Unbleached flour, especially organic, works best. These flours have more beneficial wild yeasts that blend well with your starter. If your tap water has high chlorine levels, you might want to use filtered water or let tap water sit overnight so the chlorine can evaporate.
Understanding Hydration Levels
The ratio of water to flour in your dough is called hydration, shown as a percentage. This vital calculation shapes your bread’s texture, crust, and behavior during baking.
You can find the hydration percentage by dividing water weight by flour weight and multiplying by 100. To name just one example, see what happens with 325g water and 500g flour – your hydration is 65% (325 ÷ 500 × 100).
Each hydration level creates a unique bread:
| Hydration Level | Characteristics | Difficulty |
|---|---|---|
| 60-65% | Firmer dough, easier to handle, tighter crumb | Beginner-friendly |
| 65-75% | Balanced texture, moderate open crumb | Intermediate |
| 75-85% | Wet dough, harder to handle, very open crumb | Advanced |
New bakers should start with lower hydration (around 65-70%) since it’s easier to handle the dough. You can increase hydration as your skills grow to get that sought-after open crumb structure.
Mixing Your First Dough
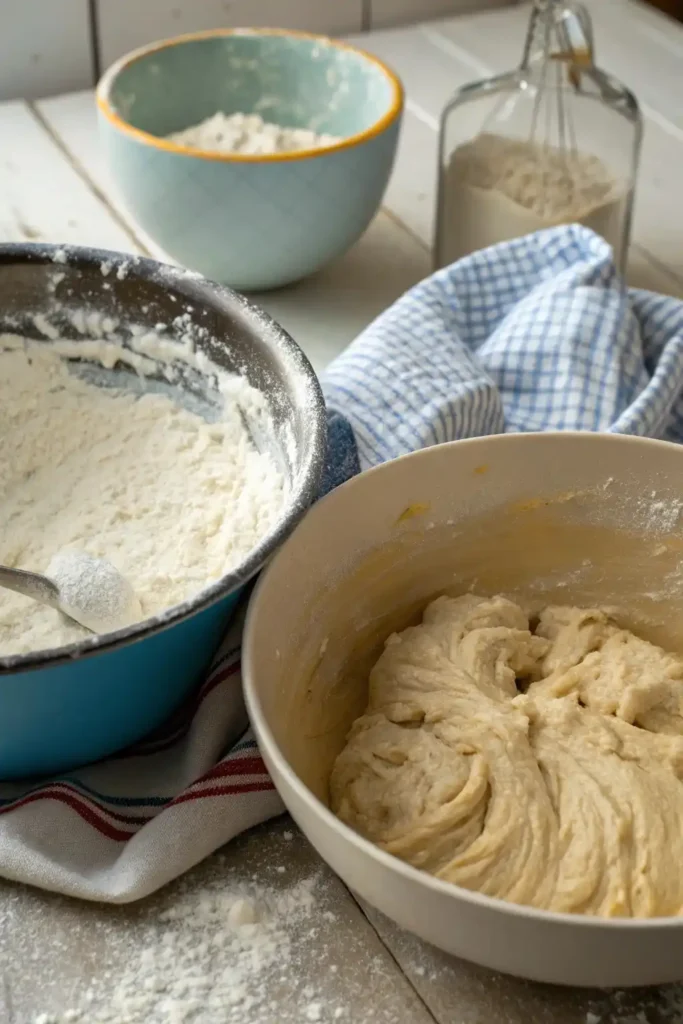
The mixing process is straightforward but sets the foundation for great bread. Here’s how to do it:
- Combine starter and water: Mix your active starter with warm water in a large bowl until well blended.
- Add flour and salt: Put all flour and salt into the water-starter mixture. Stir with a wooden spoon or your hands until you form a shaggy dough with no dry flour.
- Rest period (autolyze): Cover the bowl with a damp towel or plastic wrap and let it rest for 30-60 minutes. This rest allows the flour to hydrate fully and starts developing gluten naturally.
- Develop strength: After resting, you can choose how to build dough strength. Beginners often find success with 2-3 sets of “stretch and folds” every 30 minutes. Just grab some dough, stretch it up and fold it over, turning the bowl and repeating until you’ve gone all the way around.
Kitchen temperature plays a key role in fermentation speed. Warmer kitchens (above 75°F) speed things up, while cooler spaces slow it down. The sweet spot is between 70-75°F for predictable results.
Great sourdough doesn’t need complex techniques or constant handling. This simple recipe shows the beauty of working with just four ingredients. When you understand hydration and mixing basics, you’re ready to create amazing homemade bread.
Mastering the Stretch and Fold Technique
The stretch and fold method has revolutionized sourdough baking by replacing the old-school kneading technique. This gentle yet powerful approach can take your simple sourdough bread recipe from good to exceptional.
Why Stretching Works Better Than Kneading
The traditional kneading process requires continuous dough working to develop gluten. The stretch and fold method achieves better results with less effort and better outcomes. The quickest way to handle high-hydration doughs that would stick to your hands during regular kneading.
The sort of thing I love about this approach is the science behind it. Stretching and folding helps line up the gluten strands that form during hydration. The gluten network becomes stronger with each fold and traps gasses from fermentation. A single set of stretches and folds makes your dough much stronger.
The stretch and fold technique lets the dough rest between manipulations. The gluten molecules naturally bond during these rest periods, and you strengthen them by stretching to their full extent. Many bakers use this periodic approach like the “autolyze” strategy to reduce kneading time.
On top of that, it introduces less oxygen into the dough than heavy kneading. Your final easy sourdough bread retains more flavor compounds.
Step-by-Step Folding Guide with Visual Cues
Here’s the quickest way to perform stretch and fold on your sourdough bread recipe with starter:
- Begin with wet hands to prevent sticking. This step is vital with higher hydration doughs.
- Grab a portion of dough from one side and stretch it upward gently until you feel resistance. Your dough should stretch without tearing.
- Fold the stretched dough over toward the center of the bowl.
- Rotate the bowl a quarter turn (90 degrees) and repeat the process.
- Complete a full circle (four folds total) to finish one complete set.
These visual cues help track progress:
- Original texture change: The dough feels loose and elastic after the first fold.
- Progressive tightening: The dough becomes more resistant by the third or fourth fold.
- Between sets: Your dough should relax and spread out again during rest periods.
- After 2-4 sets: The dough changes from flat and dense to plump and jiggly – showing that the technique works.
High-hydration doughs need 15-30 minutes between sets, while stiffer doughs require 30-60 minutes. 3-4 total sets of stretch and folds work best for most recipes, though flour type and hydration level can change this.
Without doubt, you’ll learn to sense when your dough needs more strength as you practice this technique. The dough’s shape, surface tension, and the jiggle test serve as reliable indicators. A well-developed dough feels alive and buoyant.
Note that stretch and fold strengthens the dough, evens out temperature, checks fermentation progress, and adds some air. Each step brings you closer to baking that perfect loaf of easy sourdough bread.
The Art of Shaping Your Sourdough Loaf
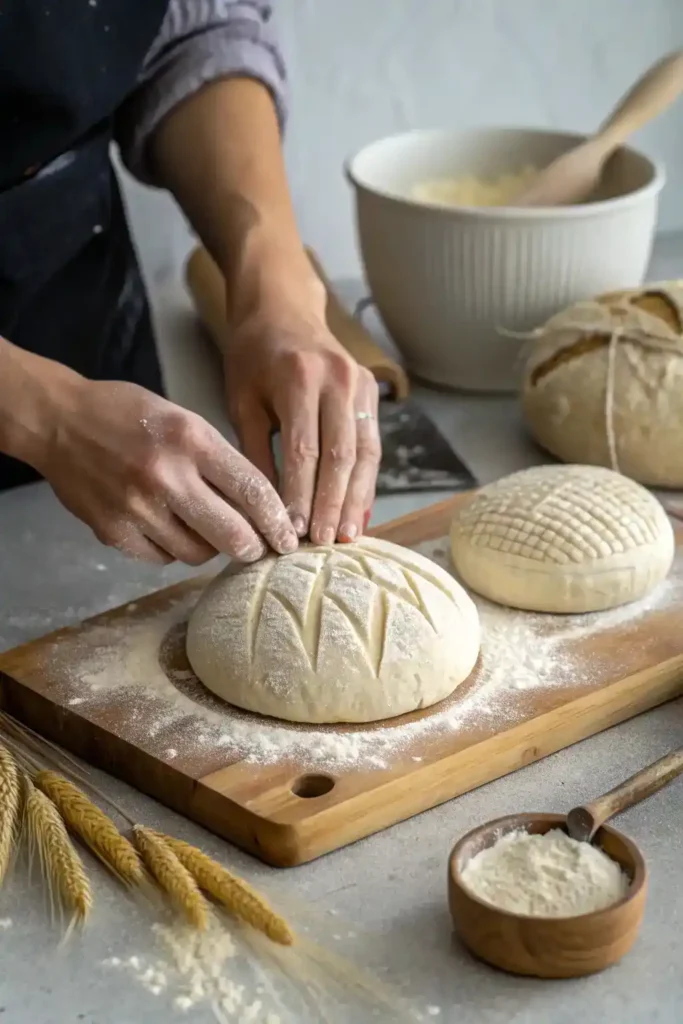
Shaping your sourdough dough marks a crucial moment that turns formless dough into a structured loaf ready for amazing oven spring. Most baking failures happen because of poor shaping techniques rather than bad ingredients or mixing. The right technique helps you tap into the full potential of surface tension.
Building Surface Tension for Better Oven Spring
Surface tension does more than make your bread look good—it’s physics working in your simple sourdough bread recipe. A well-shaped dough creates a tight outer membrane that traps fermentation gasses inside. This forces your bread to rise upward in the oven instead of spreading like a pancake.
The best results come from a two-stage shaping process. You start with a pre-shape to create structure, let it rest, then do a final shape to strengthen the dough. Here’s how to pre-shape:
- Lightly flour your work surface and gently stretch your dough
- Fold the edges toward the center to create a rough ball
- Flip the dough seam-side down
- Cup your hands around the dough, pulling it toward you to create tension across the surface
Let the dough rest for 20-30 minutes before final shaping. A basic boule (round loaf) needs repeated tension-building until the surface feels taut yet elastic. A batard (oval loaf) requires gentle stretching into a rectangle before folding and rolling it into a tight log shape.
Common Shaping Mistakes to Avoid
Poor shaping techniques can affect your sourdough bread’s look and texture. Not enough surface tension creates flat loaves that spread sideways instead of rising up. Using an oversized proofing container lets the dough spread and reduces oven spring.
You should never reshape after proofing has happened. Handling proofed dough breaks the trapped gas bubbles and reduces oven spring. Weak gluten development from earlier stages makes good shaping almost impossible.
Creating Different Loaf Shapes
Your simple sourdough bread recipe works for various shapes. Each shape needs its own technique:
Batards (oval loaves) need the dough stretched into a rectangle. Fold the sides to the middle, then roll and tuck from top to bottom to create tension across the length.
Baguettes need gentle hands to keep their airy texture while building structure. Shape into a round, rest for 30 minutes, then fold the dough onto itself several times before rolling into a cylinder.
Whatever shape you choose, put your shaped dough seam-side up in a well-floured banneton that fits your dough size. This position turns the bottom seam into the top of your baked loaf, creating a natural split line for expansion after scoring.
Good shaping techniques lay the groundwork for that beautiful bakery-style rise and artistic look in your simple sourdough bread recipe.
Scoring and Baking for Maximum Rise
The success of your bread depends on scoring and baking – the final steps that can make your loaf rise perfectly with an amazing crust. You can turn your shaped dough into a bakery-style masterpiece when you execute these techniques properly.
Simple Scoring Patterns for Beginners
Scoring does more than just decorate your bread. Your bread needs controlled weak points on the dough surface to expand during baking and prevent random blowouts. Good scoring lets steam escape and guides the amazing “oven spring” that gives your simple sourdough bread that professional look.
Your dough will be easier to score when it’s cold. Take your shaped loaf straight from the fridge before you bake it. Make your cuts about ¼ to ½ inch deep – deeper cuts might deflate the dough while shallow ones won’t give enough room to expand. A blade held at 30-45 degrees will create clean cuts and beautiful “ears” on your finished loaf.
Most loaves only need one deep straight line or curved “S” shape. You can add lighter decorative cuts around your main score as you become more confident, but don’t cut these as deep.
Dutch Oven Method for Perfect Crust
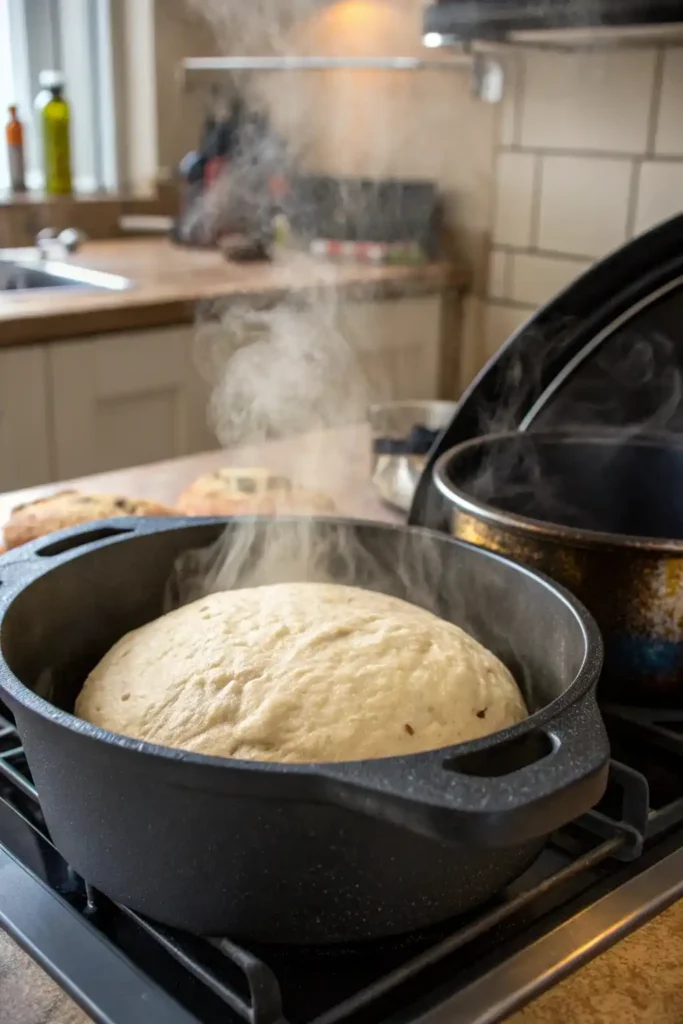
A Dutch oven creates ideal conditions just like a professional bakery. The thick walls keep heat steady and trap your dough’s moisture to create steam. Your bread’s crust stays flexible during the first phase of baking because of this steam, and this allows maximum rise before the crust sets.
Your Dutch oven needs to be really hot – heat it at 450°F. Put your scored dough on parchment paper and lower it carefully into the hot Dutch oven. Keep it covered for about 25-30 minutes so the trapped steam can work its magic. Take the lid off and bake for another 10-15 minutes until you see a deep golden crust.
How to Tell When Your Bread is Fully Baked
Your bread shows several signs when it’s done, beyond just timing. A well-baked sourdough should have a golden-brown, blistered crust. The bread should feel surprisingly light for its size once it’s out of the oven, which shows proper moisture has evaporated.
Try the “knock test” by tapping your loaf’s bottom – it should sound hollow. Listen for the “singing” crackling sound as it cools – another sign of good baking.
Let your bread cool for 4-6 hours since the inside structure keeps developing during this time. Cutting too early will leave you with gummy bread, so stay patient with your easy sourdough bread recipe with starter.
Advancing Your Skills: From Basic to Bakery-Style
You’ve got the simple stuff down, now it’s time to lift your bread to impressive heights. The gap between good and exceptional sourdough comes down to a few advanced techniques that professional bakers use.
Increasing Hydration for Open Crumb
Up-to-the-minute research shows that super-high hydration isn’t crucial for an open crumb structure. Doughs between 70-80% hydration can give you beautifully airy results while staying manageable. Your confidence will grow as you bump up hydration by 5% with each bake.
Wet doughs need lamination techniques to build superior strength. Keep an eye on your dough during bulk fermentation. Stop doing stretch and folds when the dough becomes too strong to grab easily. More turns won’t guarantee a more open crumb. Your dough might end up with a tighter interior if you overwork it.
Developing Flavor Through Longer Fermentation
Bakery-style flavor comes from extended fermentation. A longer process (12-20 hours) lets beneficial bacteria create complex flavor compounds. Your bread becomes more digestible as this extended process breaks down gluten and lowers its glycemic index.
To get longer fermentation:
- Use less starter to slow things down
- Keep temperatures lower (ideally 68-78°F)
- Let it cold ferment longer (up to 48 hours, but no more than 72)
The real challenge lies in balancing fermentation with gluten structure. Your dough might collapse if it ferments too long because the gluten network breaks down. Refrigeration after shaping changes the ratio of acetic to lactic acid, which adds more depth to the flavor.
Adding Mix-ins and Flavor Variations
Your sourdough possibilities are endless with customization. Stick to this rule: mix-ins should be no more than 20% of your flour weight. Add your flavors halfway through the stretch and fold process. This helps them spread evenly without messing up gluten development.
Jalapeño-cheddar-bacon, caramelized onion-cheddar-paprika, or chocolate-cream cheese for sweet treats make fantastic combinations. Wet ingredients will affect hydration, so pat them dry or use less water in your recipe. Sweet additions feed yeast and might speed up fermentation.
These advanced techniques will take your bread from good to truly bakery-worthy. Each small change builds on your core skills and creates bread that’s uniquely yours.
Conclusion
Sourdough bread making combines ancient traditions with modern kitchen exploration. You can create nutritious, flavorful bread that rivals professional bakeries by becoming skilled at these techniques.
Note that great sourdough develops when you practice with patience. Your best approach is to start with lower hydration doughs. Master the simple techniques first, then try different flours, longer fermentation times, and creative mix-ins.
Your first bubbly starter will lead to perfectly scored, crusty loaves and bring more than just delicious bread to your table. Each bake teaches you valuable lessons about fermentation, dough handling, and the subtle signs of proper development. You’ll also become part of a worldwide community of home bakers who share knowledge and inspiration.
Grab your simple tools, mix that first starter, and begin your sourdough adventure. You’ll succeed not by achieving perfection but by understanding your dough and adapting to its needs. The irresistible aroma of freshly baked, artisanal sourdough bread – made by your own hands – will soon fill your kitchen.
FAQs
Q1. How much sourdough starter should I use in my bread recipe? For a typical loaf, use about 50-100 grams (approximately 1/2 cup) of active, bubbly starter. The exact amount may vary depending on your specific recipe and desired fermentation time.
Q2. What’s the most common mistake when maintaining a sourdough starter? The biggest mistake is discarding and feeding your starter before it has fully risen and reached its peak. This can weaken the yeast and bacterial cultures, slowing down the starter’s development and leavening power.
Q3. What’s the key to making excellent sourdough bread? The secret lies in maintaining an active starter, properly managing bulk fermentation, handling the dough gently, and creating the right baking environment. Pay attention to dough hydration and use your starter at its peak activity for the best results.
Q4. How do I prepare my sourdough starter for baking? Before baking, feed your starter with its usual flour and let it ferment for a day or overnight. Then, feed it again and repeat this process, feeding twice a day for two days. This strengthens the starter, making it ready for baking.
Q5. What hydration level should I aim for in my sourdough bread? For beginners, start with a hydration level of 65-70%. As you gain experience, you can gradually increase to 70-80% for a more open crumb structure. Remember, the ideal hydration depends on your flour type and personal preference.

1 thought on “Easy Sourdough Bread Recipe with Starter”
Comments are closed.